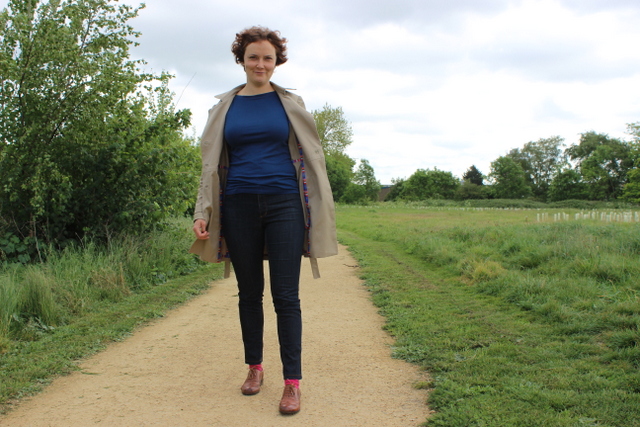
At the beginning of May I got a new job – starting June 1st. My sewing immediately kicked into overdrive and I was consumed with a desire to sew as much as possible – I made myself a Beatrix blouse and two more Bonnie tops in just three days. But I got to thinking, I use to sew a lot in the evenings after work, and what I really should do with my remaining free days was tackle something new and challenging. I’ve wanted a beige trench coat for ages and I decided that this was the time to go for it.
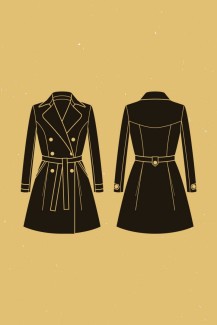 I chose the Luzerne trench coat from Deer and Doe and found some beautiful light weight twill at Raystich. I had wanted something a little heavier, but it was the exact color I had in mind so decided just to go for it. And in the end it was the perfect weight!
Now the very first step had me out of my comfort zone: bound buttonholes. I’ve never made these before and I really should have practiced a few times on some scrap. But after procrastinating for a day I jumped straight in. A note for next time, when sewing the squares, it’s best to use a slightly shorter stitch to ensure the corners are night and tight. While they are not brilliant, they’re not an eye sore so I decided to be happy with them.
As the pattern requires 10 meters of bias binding for Hong Kong seams (though in the end for size 40 I only needed 9 meters) I decided to buy some (instead of making it myself like I normally do). However at first I couldn’t find anything that caught my eye. Then I saw IT. You know how it is, nothing is right and then it jumps out at you and no matter how expensive it is you have to have it (it was £2.20 a meter – you do the math). And I love the effect!
")

For the buttons I headed over the McCulloch & Walllis to find myself the exact buttons I wanted. All in all my supplies set me back a pretty penny but as I finally am leaving unemployment behind, I decided to treat myself!
")

Now the facing was a little tricky. Obviously the princess seams and back yoke were sewn with a 5/8″ seam, but that meant that the facing with is bias bound edge extended 5/8″ over the seam. After basting the facing to the coat, I felt like this resulted in excess amounts of fabric just flapping about inside (as you can see in the photos below). In the end I tacked it down at the seams.


I am so pleased with the final result and the pockets oh the pockets – it is exactly what I wanted and it turned out pretty good. I’m super glad I took it on while I had whole days to devote to sewing as it progressed quite rapidly.
")
")

")
")
")

I love this pattern and yours looks great. I’m trying to pluck up the courage to sew something similar, though maybe it will wait until the autumn now!
LikeLike
Thanks so much. I’m so glad i dinally got round to making a coat and its the perfect weight for London summers.
LikeLike
This is amazing! Well done on a great execution!
LikeLike
Thabk you so much!
LikeLiked by 1 person
Lovely trench coat, I really like this pattern, another one for the list!!
LikeLike
I totally recommend the pattern!
LikeLiked by 1 person
You made yourself a beautiful coat there! I’ll be great to swan in to your new job wearing it!
LikeLike
Hehe my thoughts exactly! It always makes me more confident wearing me made clothes !
LikeLike
Y
LikeLike
Your trench coat looks great! Nicely done!
LikeLike
Thank you!
LikeLiked by 1 person
Beautiful job on this coat! And congrats on the new job. I’m starting a new job at a similar time, and it does make me want to get as much sewing done as possible too as I’m going from 4 days a week to 5 – losing one precious day of sewing!
LikeLike
Thabk you and good luck on ypur new job too! Its amazing how it galvanized my sewing these last few weeks!
LikeLiked by 1 person
Gorgeous coat, it looks amazing on and love the stripey binding.
LikeLike
Thank you! I knew as soon as it saw the binding i had to gave it!
LikeLike